14 Fundamental Rules of Photography
- Court Whelan, Ph.D.

- Dec 14, 2025
- 7 min read

I had an absolute blast recording my latest podcast episode because it tackles something every photographer secretly craves… a foundational understanding of photo "rules." This is not a rigid rulebook that squashes creativity, but a set of starting points that give you intentionality.
Once you know the common starting points, aka rules, you can intentionally break “rules” unleashing further creativity (although the traditional rules definitely do not fly in the face of creativity...they're fundamental for a reason).
Below are the 14 fundamental rules, written as a practical field guide you can actually use on your next shoot (wildlife, landscapes, travel, your kid’s soccer game, your dog doing that adorable head-tilt thing… all of it).
Alright—let’s get into it...

Rule 1: Focus on the eyes
If your subject has eyes, the eyes are always going to be the focal point. Without this, your photo will be very distracting and likely be botched. Don't take my word for it...try this out and see the difference. This one is almost non-negotiable.
How to use it
Use single-point AF (or eye-AF if your camera has it).
Put the focus point on the nearest eye.
If you’re shooting shallow depth of field, this becomes non-negotiable.
Don't focus on the ears, nose, or face...go for the eye(s).
When to break it: Honestly? Rarely. If the eyes are soft and everything else is sharp, the image feels “off,” even to non-photographers.
Rule 2: Rule of thirds
Break your frame into a tic-tac-toe grid. Place key elements along those lines—or on the four intersection points. There is no perfect way to deploy the rule of thirds in your photography, but the gist is that you want to break your scene into thirds, not halves, quarters, or otherwise.
Big bonus points if you also place key subjects or ingredients of the scene at one or more of the four intersecting points.
How to use it
Turn on your grid overlay (camera or phone).
Place horizons on the top third or bottom third.
If your scene has components from left to right, also break those into thirds (trees, mountains, people, wildlife)
Place your subject at or near an intersection point. When in doubt, place them slightly more toward center vs. outside of the grid/intersecting points.
When to break it. You can place subjects in the dead-middle, or way outside of the grid...
For symmetry (reflections, doorways, centered portraits)
For scale drama (tiny subject in a huge scene)
To exaggerate composition (horizon at the bottom 10% can make skies feel epic)
Rule 3: The inverse focal length rule
To reduce handheld shake and shoot 'fast enough', you should use a shutter speed at least 1 / focal length.
Examples
100mm → ~1/100 sec
300mm → ~1/300 sec
When to break it
If you have stabilization (in-body, or in-lens) and solid technique, you can go slower
Rule of thumb: you can often push 2 stops slower if you’re steady
Key Takeaway: Start with 1/focal length, then you can halve that once or twice, such that shooting at 300mm, I would feel ok going to 1/150, and decent going to 1/75, but not much slower.
Rule 4: The side lighting rule (because flat light is… flat)
Side light gives dimension: texture, shape, and mood.
How to use it
Don’t automatically put the sun behind you, even though that is the strongest light.
Move yourself or your subject so light hits from ~45°. (feel free to experiment with this)
When to break it
Backlighting for rim glow (fur, hair, feathers = magic)
Front light when you need clean detail or it's very soft light (sometimes it’s the right call)

Rule 5: The golden hour rule
The hour after sunrise and the hour before sunset often gives the most beautiful light. If you have the flexibility and/or are doing a photo shoot, this is the time of day to aim for to yield the best shots...color, softness, angle, etc.
When to break it
Midday can work if you lean into:
shade and shadows
cloud diffusion (not direct sunlight)
black and white photography
reflections
silhouettes
We break this rule often, so don't distress. Just know that the golden hour is something to truly aim for.
Rule 6: Odd numbers look better
Our brains are wired to love odd numbers. Even numbers look a bit too orderly by comparison, and odd numbers create mild tension, making the photo more compelling.
How to use it
When composing flowers, people, animals, rocks—try framing 3 or 5 elements instead of 2, 4, etc..
When to break it
When symmetry is the story or you just don't have another option (two perfect lion cubs? go for it)

Rule 7: Keep horizons straight
Crooked horizons make viewers feel uneasy.
How to use it
Turn on a level/horizon guide if you have it.
But truly don't worry about nailing it in-camera. Shoot slightly wider and adjust the levelness in post.
When to break it - it's tough, and rarely done, but you can get really artsy
When the horizon isn’t a clean line (mountains, trees, chaotic backgrounds)
For intentional dynamic angles (done sparingly, like spice)
Rule 8: Foreground, mid-ground, background
Great images often have layers—something near, something medium, something far. This helps create a dynamic scene and lends itself to better storytelling and organization in your image.
How to use it
Find a foreground anchor (flowers, rocks, wildlife, people).
Set up your shot to include mid-ground elements (trees, animals, buildings).
Further set up your shot (you may need to move) to add an interesting background (mountains, sky, distant scenery).

Bonus tip
For big landscapes: focus about one-third into the scene and use something like f/8 or f/11 to keep depth and maximize focus.
When to break it
Minimalism! A single subject + clean negative space can be insanely powerful. Don't get locked into this one (fore, mid, and background aren't always available in nature).
Rule 9: Expose for the highlights (blown highlights don’t come back)
It’s usually easier to lift shadows than recover over-exposed whites in post. There simply is no data in blown out highlights, while shadows do retain some photo data with digital.
How to use it
Slightly underexpose bright scenes (snow, sky, reflections).
Recover shadows later if needed.
When to break it
When you want high-key glow, flare, or intentional blowout as a style choice. I do this a lot, actually, so get creative and break away!
Rule 10: The “look into space” rule (give your subject room to breathe)
If your subject is looking right, place them (or their face) on the left side so they’re looking into the frame. Simply put, if the subject is looking off-frame, vs. into the space available, it usually isn't as good. Your viewers will notice...

How to use it
Notice which direction the eyes/face/body points.
Leave more negative space in that direction.
When to break it
To create tension, mystery, or “what are they looking at?” energy(use sparingly—this one can feel awkward fast). It's quite rare, but can be done.

Rule 11: Avoid lines through heads (the “tree growing out of skull” problem)
Horizon lines, branches, poles—if they are jutting out behind someone's or something's head, it just doesn't look that good. It creates tension and awkwardness that we really don't want.
How to use it
Before you press the shutter, scan the background.
Move your feet or raise/lower the camera slightly to get that branch or horizon above or below your subject's head and face.
When to break it
Mostly when you can’t avoid it (busy environments)… but even then, try.
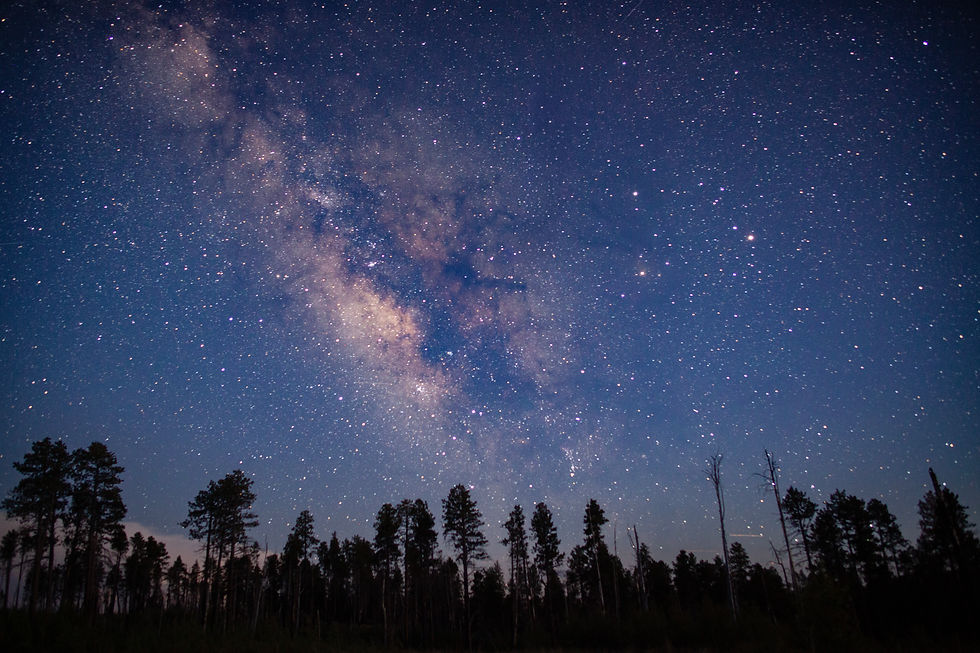
Rule 12: The 500 rule (astro folks, this one’s for you)
To avoid blurred stars (aka, small star trails): Max shutter speed ≈ 500 / focal length. Long star trails are cool (1hr plus) but short ones, like 35 or 45 seconds just look blurred. Unfortunately, we must keep our shutter speeds 'fast' even in cases when we need more light.
Example
24mm → 500/24 ≈ 20–21 second max exposure
Pro Tip: keep in mind, the focal length I'm speaking of is the full-frame equivalent. If you have a crop frame sensor, figure out the multiplier (Canon is 1.6x and Nikon is 1.4x) and multiply your focal length to get the full-frame equivalent to do this calculation correction. For example, a 16mm on a Canon crop frame is actually more like a 26mm (then 500/26 gets you there).
When to break it
When you want star trails (different vibe, equally awesome)

Rule 13: Subject separation (make the subject pop)
A sharp subject + softer background draws attention to exactly where you want it. Plus, it makes your subject look even sharper!
How to use it
Use a wide aperture (f/2.8–f/4 is great).
Get closer to your subject.
Increase distance between subject and background.
Think of depth as a ratio...if you are closer to your subject than your subject is to the background, there will be blur. If your subject is right in front of its background, and you are distant, it will never be blurred and you'll never get that subject separation. Play with the ratio and get amazing results, even if you don't have a 'fast' lens like f/1.8 or f/2.8.
When to break it
When the background is part of the story(environmental portraits, epic vistas, cultural scenes)

Rule 14: Simplification (if it doesn’t add, it subtracts)
This is the quiet superpower of great photography.
How to use it
Ask: “What is my subject?”
Remove distractions by:
changing angle (to make the background further)
zooming in (telephoto renders more background separation)
moving your feet (sometimes a few steps closer make a big difference)
waiting for people/objects to clear
cropping intentionally
When to break it
When chaos is the story (markets, festivals, energetic travel scenes). Sometimes the mixture and flurry is captivating and the mash-up looks interesting.
Want the full episode + extra tutorials?
If you enjoyed this article, I recommend checking out both my photo tutorial podcast, The Wild Photographer and YouTube Channel.
The best way to help out? Subscribe, leave a review, or share this email with a photo buddy who loves this stuff. I sure do!
Until next time,
Court


Comments