Breaking the Rules of Photography...Intentionally
- Court Whelan, Ph.D.

- Jun 9
- 7 min read

Photography has a funny relationship with rules. On one hand, rules are incredibly useful. The rule of thirds, tack-sharp focus, level horizons, golden hour light, clean compositions — these are all helpful shortcuts that can get us to stronger images faster.
They give us a framework. They help us make order out of visual chaos.
But here’s the important bit: photography is still art. And art doesn’t get especially excited about being trapped inside a checklist.
That’s what my latest episode of The Wild Photographer is all about: not ignoring the rules because we don’t understand them, but breaking them because we do. There’s a big difference between a crooked horizon because you forgot to level your camera, and a crooked horizon because the angle of a coastline, a storm front, or a running animal creates more drama that way.
A photograph can be technically imperfect and still be visually unforgettable. In fact, some of the most memorable images are the ones that feel a little unexpected. They stand out, or pull at us, because they don’t look like every other “proper” photo we’ve seen.
So, in this article, I'm going to go over the main talking points from my latest episode and give you a written guide for breaking the rules of photography.

1. Put the Subject Somewhere “Wrong”
One of the first composition rules many photographers learn is the rule of thirds. And for good reason: it works. Placing a subject along one of those imaginary grid lines or intersections often creates balance and flow. But sometimes, balance is boring.
One of my favorite ways to break this rule is through exaggerated composition. Instead of neatly placing the subject on a third, try making it tiny in the frame. Put the elk in the corner of a sweeping meadow. Let the sky dominate. Let the mountain dwarf the animal. Let the landscape become the story.
This works beautifully when you want to communicate scale, solitude, grandeur, or wildness. A small subject in a massive scene can say far more than a perfectly framed close-up.
And then there’s the opposite approach: put the subject dead center. Yes, right in the middle.
This can work especially well when there’s symmetry or uniformity in the frame. Think of a squirrel surrounded by a consistent meadow of grasses and wildflowers. Or a market scene photographed from above, where circular baskets, plates, spices, or produce naturally draw the eye toward the center. When the left and right sides of the frame feel balanced, a centered subject can feel deliberate, graphic, and surprisingly powerful.

2. Stop Chasing the “Perfect” Exposure
Modern cameras are impressively smart, but they are not artists. They are little calculation machines trying to average a scene into something close to neutral. Useful? Absolutely. Always right? Not even close.
One of the best rules to break is the idea that every scene needs to be perfectly exposed across the whole frame.
Sometimes, you want the image to be extremely bright. Sometimes, you want it moody and dark. High-key and low-key photography can create emotion, mystery, and drama that a “correct” exposure simply won’t.
Imagine a dark subject surrounded by bright light. Instead of preserving every highlight, you might expose for the subject and let the rest of the frame become luminous and airy. Or picture a beam of sunlight cutting through a dense rainforest. Expose for that beam and allow the surrounding forest to fall into deep shadow.
The camera might think you’re doing it wrong. That’s fine. The camera is just doing it's digital job.

3. Let Blur Tell the Story
Sharpness is wonderful. In wildlife photography especially, we often want crisp eyes, clean details, and frozen motion.
But not every photo needs to be tack sharp.
Motion blur can bring energy, movement, and atmosphere into an image. It can make a market feel busy, a dancer feel alive, or a moving animal feel dynamic. The trick is to look for motion that is predictable or sustained. A single quick twitch of a bear’s paw is hard to plan for. But walking people, twirling dancers, moving water, vehicles, birds, or repetitive animal behavior can all be great candidates.
A good place to begin experimenting is around 1/60th of a second or slower, depending on how fast your subject is moving and what lens you’re using. You don’t need a wildly abstract blur every time. Even a little motion can shift a photo from static to alive.

4. Don’t Always Focus on the Eyes
This one feels highly rebellious to say out loud.
In wildlife photography, focusing on the eyes is usually excellent advice. It creates connection. It gives the viewer a place to land. But there are rare and interesting moments when the eyes don’t need to be the sharpest part of the image.
Maybe you’re photographing a bear’s face extremely close, and the nose — textured, detailed, enormous — becomes the most interesting feature. Maybe the eyes are blurred slightly behind it, adding tension or mood.
Or maybe the foreground tells the story. Picture a lioness moving through tall grass. Instead of focusing on the lion, you focus on the grass in front of her. The animal becomes a ghosted presence in the background, and suddenly the image says something different: stealth, concealment, tension, anticipation.
The eyes are still important. But they are not the only possible story.

5. Let the Horizon Be “Wrong”
A level horizon is usually a good thing. A slanted ocean sunset with no clear intention can feel like you missed the shot.
But there are times when tilting the frame can add energy and direction.
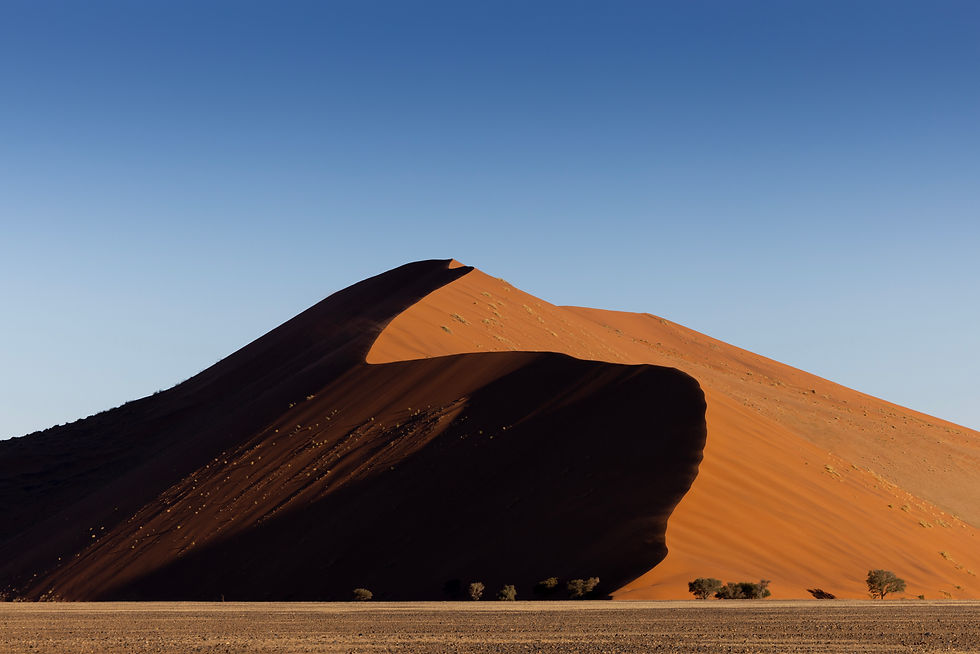
In filmmaking, this is often called a Dutch angle. In photography, it can work when the natural lines of the scene already suggest movement: a coastline, a dune, a forest canopy, a storm cloud, a running animal, a crashing wave.
The key is intention. If someone asked, “Why isn’t the horizon level?” you should have an answer better than, “Oops.”
Maybe you tilted the frame to align with the incoming waves. Maybe the diagonal of a beach created a stronger leading line. Maybe the animal’s path mattered more than the horizon. When the angle supports the story, the “wrong” horizon can be exactly right.

6. Embrace Maximalism
One of my favorite rules is: if something doesn’t add to the photo, it subtracts.
Most of the time, that’s great advice. Simplifying a scene usually makes it stronger.
But sometimes, the chaos is the point.
Busy markets, layered forests, crowded streets, dense cultural scenes, messy weather, complex habitats — these can all benefit from a maximalist approach. Instead of zooming in and eliminating everything, zoom out. Let the clutter become layers. Let foreground, midground, and background all contribute to the feeling of being there.
This is especially useful in travel photography, where atmosphere matters. A scene can be visually busy and still be successful if the busyness adds to the story.

7. Shoot in “Bad” Weather
We often dream of blue skies, glowing light, and perfect conditions. But bad weather can produce some of the most memorable photographs.
Clouds soften light beautifully for portraits, including wildlife portraits. Rain adds mood. Snow simplifies landscapes. Storms create drama. Fog adds mystery. Adverse conditions can help you show a place in a way most people never see it.
Of course, safety comes first — for you and your gear. No photo is worth lightning, cliff edges, or a soaked camera. But when conditions are safe enough, don’t pack up too quickly. The weather everyone else avoids may be exactly what sets your image apart.

8. Flip Depth of Field Expectations
The usual advice is simple: use a shallow depth of field for wildlife, and a deep depth of field for landscapes.
Now flip it.
For wildlife, try stopping down and showing the animal in its environment. Get the foreground, background, and subject all working together. This can create a “wildlife in landscape” image, where habitat becomes just as important as the animal.
For landscapes, try a shallow depth of field. Focus on flowers, rocks, grasses, leaves, or some other compelling foreground detail, and let the grand scene behind it blur. You’ll still suggest the larger environment, but with a more intimate, artistic feel.

9. Photograph at Midday
Golden hour is glorious. No argument there. But midday light — harsh, contrasty, and often considered terrible — can be a creative playground.
This is a great time to experiment with high-key and low-key photography. Bright highlights and deep shadows create bold contrast. And if color feels too harsh or distracting, try converting the image to black and white in post-processing. Many midday photos suddenly come alive once simplified into tones, shapes, and contrast.
Constraint is often where creativity starts sharpening its claws.
10. Photograph the Aftermath
Wildlife photographers often chase peak action: the leap, the strike, the splash, the crossing, the flight. But what happens after the moment can be just as interesting.
Tracks in mud. Ripples after a bird dives. Broken ice after a seal surfaces. Feathers after a hunt. Trampled grass after a herd passes through. Fur left behind after bears spar.

These images tell stories through absence. The main event is gone, but the evidence remains. And that can create a different kind of intrigue — one that asks the viewer to participate, imagine, and complete the story.

11. Break the Astrophotography Rules with Star Trails
In classic astrophotography, we often try to avoid star trails by limiting shutter speed. But star trails themselves can be spectacular.
Instead of freezing the stars, lean into the Earth’s rotation. Use bulb mode, a sturdy tripod, and a very long exposure — often an hour or more — to create those circular trails across the sky.
This does take patience, planning, and a dark location away from stray light. Even a distant campfire or flashlight can dramatically affect the image during such a long exposure. But the results can be wonderfully strange and beautiful, turning the night sky into something almost abstract.

The Real Rule: Break Rules With Intention
The point isn’t to cast every photographic rule into the trash and think you're going to consistently make beautiful images. Rules are useful. They exist because they often work.
But they are not the only path to a great photograph.
A simple exercise is to choose one rule to break on your next outing. Just one. Center every subject. Shoot only slow shutter speeds. Look for bad weather. Use maximalism. Create massive negative space. Photograph the aftermath instead of the action.
Will every photo work? Absolutely not. But the exercise will sharpen your eye. It will teach you when a rule is helping and when it’s holding you back.
Because in the end, great photography isn’t about obeying a checklist. It’s about making the frame feel alive.
And sometimes, the best way to do that is to break the rules beautifully.
Happy shooting!
Court


Comments